We’re picking up our series of Design Cycle posts today to talk about creating prototypes. In October, we talked about defining the problem. In November, we provided you with a variety of resources on food insecurity to help students research the problem, and in December, we covered the next two steps of the process, imagining possible solutions and creating a plan by selecting a solution that looks promising.
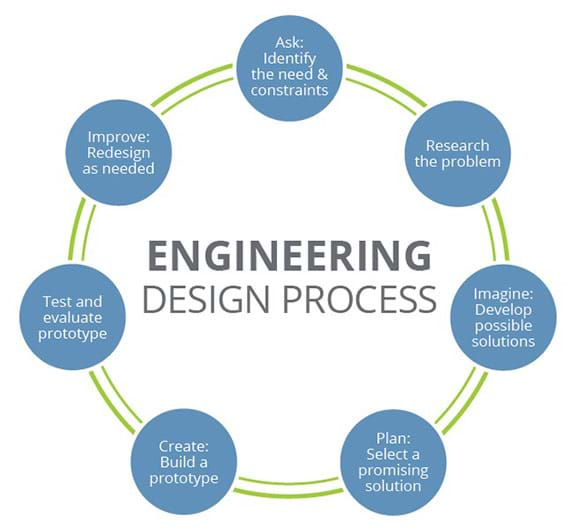 The next step of the design cycle is to build a prototype. A prototype is a physical model of a solution. By creating a physical model of their solution, students will get a better understanding of how well their solution works. Prototypes can be tested by sample users to help to show how others will interact with the solution. Completing the prototyping process will help determine how feasible the solution actually is and give students an opportunity to adjust as needed.
Advice from real scientists and engineers
At Battelle, our mission is to solve the world’s most challenging problems. Scientists and engineers here use the Design Process in their work every day. We reached out to our experts and asked, “What advice do you have for students as they create prototypes of their design challenge solutions.”
Matthew Young, a Senior Research Scientist offered this thought, “The important thing is to make a very simple first prototype and go in with the mindset that you’re going to learn from that one and build a second generation…or third…or…”
Two of our mechanical engineers, Steven Huckaby and Thom Haubert, offered this advice:
“Don’t wait until the final design is done to start prototyping and testing. If possible, break the design down into smaller elements and prototype/test those first to establish feasibility of your concepts and components. For instance, if [you] are designing a robotic arm, you don’t need to have it designed down to the fingertips before you assess if the systems/components you plan to use at the shoulder will be strong enough. Figure out the loads, range of motion, speeds, etc. the shoulder needs to do and build a prototype of the shoulder part of the design to see if it can meet those requirements. It doesn’t have to look like the final design or have the functionality of the rest of the arm to learn if the shoulder will work or not, and whether you need to figure out a different way of doing it…
The overall point is that given the time and resources available to them, the students should at least consider if they can break the design down into smaller pieces for prototyping/testing in addition to prototyping/testing the design as a whole. You don’t always have to do that, but sometimes it’s very useful.”
About Intellectual Property
Our mechanical engineers reminded us that managing Intellectual Property rights is worth considering, depending on the solutions invented. Don’t underestimate the value or worth of a solution, just because it was made by a student. There are plenty of “kid inventors” who have made a big impact with their design ideas. We reached out to Professor Prototype from Invention League for some advice to students on protecting their Intellectual Property. Many students in competitions like Invention Convention and the Conrad Challenge apply for patents to protect their ideas. Professor Prototype recommended that students look at the resources available at the US Patent and Trademark Office website for information about pursuing patent protection.
Prototypes are required this year
This year, we’re asking each group to create a prototype of their solution to be displayed at your school showcase. We are leaving the prototype specifications pretty general for maximum creativity, but here are some general guidelines:
Prototype Specifications (as inspired by Invention League)
- Must be a physical representation of group’s solution
- Students do not have to produce prototypes in a fab-lab or maker-space—it can be made at school or home, with household objects or scrap materials.
- Does not have to be a working model, but students need to be able to explain how it would work. If it can be operational, it should be.
- Must be able to be transported in a vehicle (i.e. possibly to the Statewide Showcase)
- Lighters, matches, candles or any other open flame or heat source or anything material or liquid considered combustible is prohibited.
- Bio-hazards and potentially dangerous materials are prohibited
- Demonstrations/presentations may not include human beings or living creatures.
- Other restrictions include: No electric stun guns, martial arts weapons, guns, replica guns, ammunition, fireworks, knives of any size, mace, pepper spray, razors, box cutters or balloons
We are so excited to learn about your students solutions and prototypes. If you have any questions, please post below.
As you are creating, don’t forget to post your pictures on social media and tag @OSLN with the hashtag #STEMfeedsOhio.
Finally, don’t forget to register your school’s participation in the challenge and your showcase date with us.